专注于SF6气体检测的专业化

SF6 dew point instrument operating procedures
With the rapid development of China's power industry, SF6 technology has been applied more and more widely. SF6 gas is an ideal insulating and arc extinguishing medium because of its inherent characteristics. However, its micro-water content will have a direct impact on the operation of equipment, the safety of personnel and the reliability of the power grid. Therefore, the micro-water content monitoring of SF6 electrical equipment has always been an important part of equipment monitoring in related industries. SF6 dew point instrument is suitable for a wide range of fields, air, nitrogen, inert gas and any gas without corrosive media humidity measurement, especially suitable for SF6 gas humidity measurement, electric power, petrochemical, metallurgy, environmental protection, scientific research institutes and other departments.

First, operation steps:
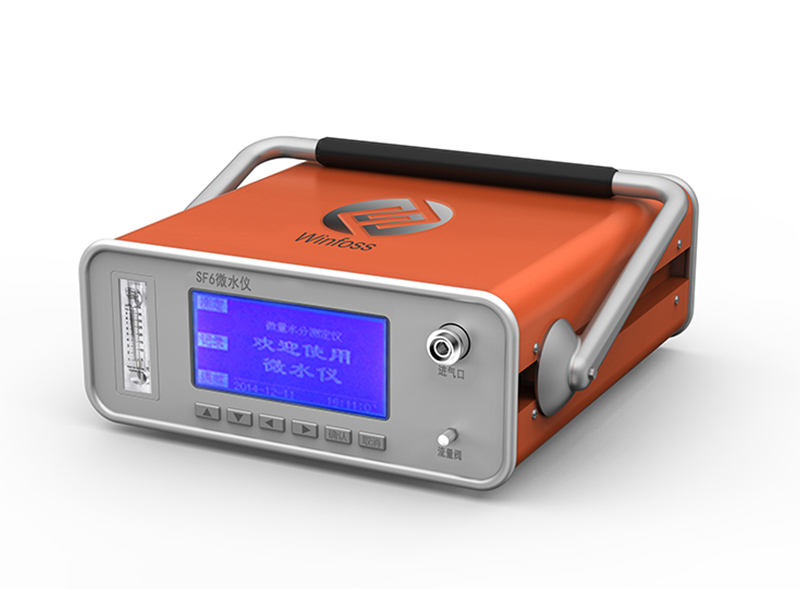
1, Turn on the power, the instrument will automatically initialize. After the completion of self-calibration, it automatically enters the measurement state.
2. Confirm that the high-precision regulating valve on the instrument is closed, and insert the quick plug of the test pipe into the air inlet of the instrument.
3. Connect the other end of the test pipe to the air supplement port (or test port) of the reception test equipment.
4. At this time, open the regulating valve on the front panel of the instrument, and then adjust the gas flow.
5, the first measurement (SF6 water) takes 5 to 10 minutes, then each measurement takes 3 to 5 minutes.
6, when measuring the SF6 dew point, adjust the flow rate to about 0.5 SLM(standard liters per minute).
2. Store data:
After the measurement data of the device is stable, you can save the data. Press the text of "Menu" on the screen to bring up the main menu interface, select "Print data", you can print out the current test data, select "Save data", you can enter the data saving interface.
Press the red "Configuration" button to enter the test number. After confirming the error, you can press "Save data" in the lower right corner to save the current data to the inside of the instrument. The instrument can hold 1000 data pieces.
Third, view the data:
Choose View Records from the main menu. On the screen for viewing historical records, press the ↑ and ↓ arrows to scroll up or down the historical records. Press the lower right key to print the current historical records.
4. Delete data:
Choose Delete Data from the main menu to enter the Delete Data page. Press the trash can icon to confirm the deletion of all data. Press the arrow in the lower left corner to undo the deletion and return to the main interface.
(Note: Confirm that deleted data cannot be recovered)
5. Modify the time
Select the Modify Time function from the main menu. The Modify Time page is displayed. Enter the current time according to the format at the top, and press the lower right button to modify the time, the modification is complete. Press the ← arrow to cancel the modification and keep the original time unchanged.
6. Calibration data
Arbitrarily changing the calibration data will seriously affect the use of the instrument. Therefore, we do not open the calibration function of the data. Contact Weavers technical support if necessary.
7. End measurement
1. Close the high-precision needle regulating valve on the instrument.
2. Remove the adapter from SF6 electrical equipment.
3. Remove the quick plug connected between the test tube and the back version of the instrument.
4. Repeat the above steps to test the next data.
5. After all tests are completed, turn off the power supply.
Viii. Precautions
1, the instrument should be placed in a safe position to prevent falling and avoid severe vibration.
2, the instrument should be charged in time before use.
3, charging only need to connect the power cord to the AC socket, no need to open the power switch, the instrument will automatically charge, charging time 4, generally need more than 10 hours.
5, the instrument uses high-capacity lithium batteries inside, because of the battery characteristics. Therefore, it is recommended that when the instrument is not used for a long time, it can be charged once every 1 to 2 months. To keep the lithium battery alive.
6, the instrument should not be put into the aluminum alloy packing box, and placed on the test bench or instrument shelf to prevent dust and moisture.
7, the instrument is calibrated with standard gas once a year. It can be sent to the manufacturer or authorized unit for calibration to ensure accuracy.

 EN
EN


 上一条:
上一条: 

 沪公网安备31011802003762
